To me, a fireplace is what makes a home FEEL homey. It is usually the focal point of a room and is so fun to decorate for each holiday and season. If you can’t tell, I LOVE a fireplace. We are in the process of finalizing plans for our home build and one thing that was a must have on my list is a fireplace! But, what if you DO have a fireplace, but it is simply outdated and not working for your style anymore?? What if you don’t love it and are longing for something more updated and stylish, WITHOUT costing you an arm and a leg? If this is you, then THIS is the post for you!
In this post, I want to share with you how to whitewash your brick AND how to paint over that brassy finish. 2 for the price of one here today, folks! Doesn’t get much better than that.
Now, I have one little confession to make before I get started. You see, I did this job for a sweet lady, but I didn’t think I was going to post it when I did it. In all honesty, I simply didn’t think about it. I did the job and forgot. It is gettin’ real in here today. SUCH a bad blogger! BUT, I did manage to get a couple before and after pictures with an IPhone, and when I got my head on straight and knew that I definitely wanted to share how easy this is with y’all, I figured I would give it a go with as much details as possible without the “how-to” pictures. Forgive me, please?
I will start with the brick!
Supplies Needed for Whitewashing Brick:
White paint of any kind (I used a chalky type paint JUST because it is what I had and I knew it didn’t matter)
Cup (about the size of a disposable red solo cup)
Water
Paint Brush (Any will do- I used a chip brush like this one)
Old Rag
Brick 🙂
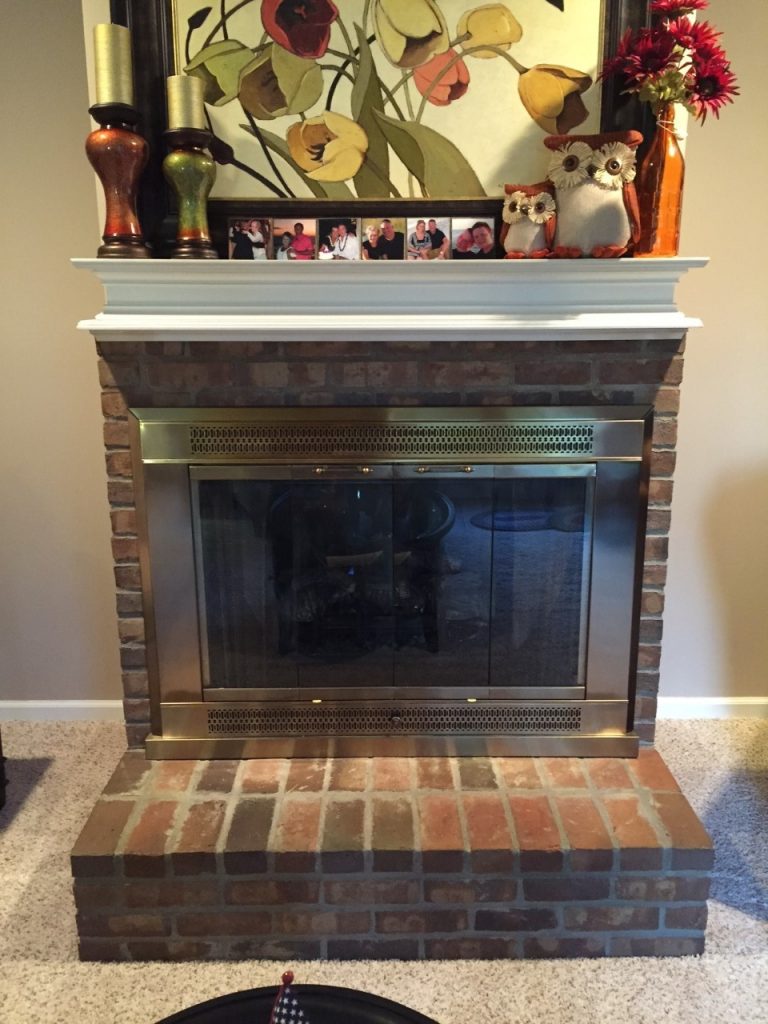
Here is the fireplace BEFORE:
It was a lovely enough fireplace, but she wanted it spruced up. She asked me to white wash it and paint the brass. I had never done either before, but I knew I could…and I did. YOU can too!
To whitewash the brick, I took a small disposable cup and put about 1/2 paint and 1/2 water. If you want less coverage, add more water…and if you want more coverage, add more paint.
This mixture made the paint VERY watery, and that is how you want it to be.
Next, I took my chip brush and started painting the mixture on, brick by brick. I started in an area that wasn’t going to be seen much, so that I could make sure it was going to look right. I suggest doing this. I also suggest doing 1 brick at a time. Paint a brick and piece of grout and then wipe it off with your old rag. This removes the majority of the paint, leaving that “washed” look that we are going for!
After a couple of bricks, you can tell how awesome it is going to look and you will be super excited. Keep doing this until ALL of the grout and bricks are covered.
EASY PEAZY, LEMON SQUEAZY!
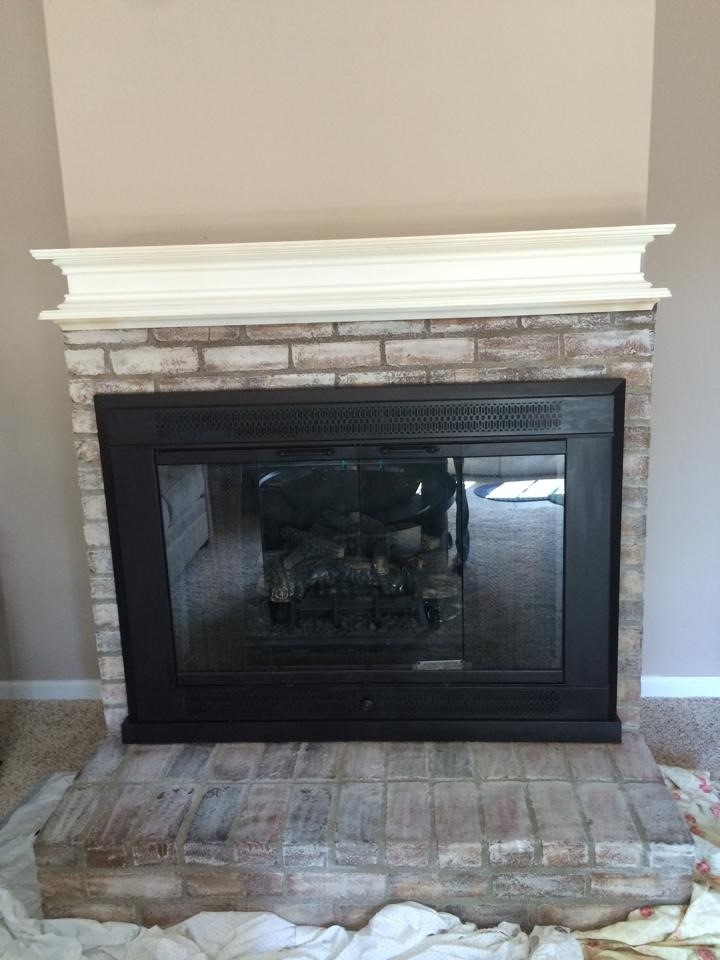
This is what it looked like AFTER I whitewashed it! (And after I had painted the brass…but I will get to that in a second.)
WOW! What a difference! Isn’t it gorgeous??
Now, to the brass…
This is super easy as well, but it was a little more time consuming that I had anticipated. Read on and I will share why.
Supplies Needed for Painting the Brass on a Fireplace:
Foam Brush (Here is a whole set so you can decide which size you need for your specific job)
Rustoleum High Heat Protective Paint (This paint is specifically designed for high heat resistance, so it is a must that you use this kind. It protects up to 1000 degrees)
Basically, you paint this like you would anything. It is a very runny paint, so start with a small amount and paint it on. It will NOT cover well at first at all. I was like, OH CRAP…this will take me forever…but once it dried (which didn’t take long at all), the second coat went on much much better. It took me 3 coats in all to get full coverage. The foam brush cut down on any brush marks, and I was very pleased with the final result.
NOW, about the hard part of this…
A lot of the brass screens have brass INSIDE of the glass as well. Not all of them do, but many do. I had a very very hard time getting my brush in there to get that part so that you could not see the brass shining through the glass. I had to get a very small paintbrush to get in there, and it took a long time. I have to be honest about that part. Of course, all are made differently, so yours may not be made like that, and if it isn’t- GOOD for you!
Like I mentioned, the black didn’t take long to dry at all, so give it just a little time before starting on the next coat.
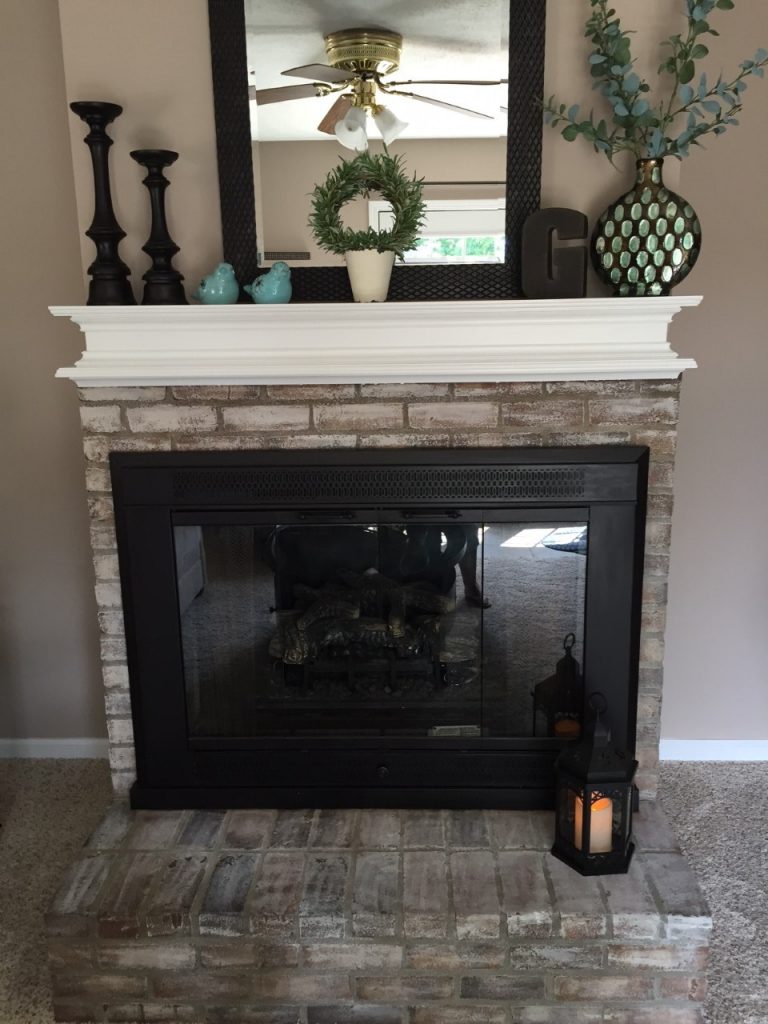
Here is the fireplace NOW after she got it all decorated!
The difference is literally NIGHT and DAY!
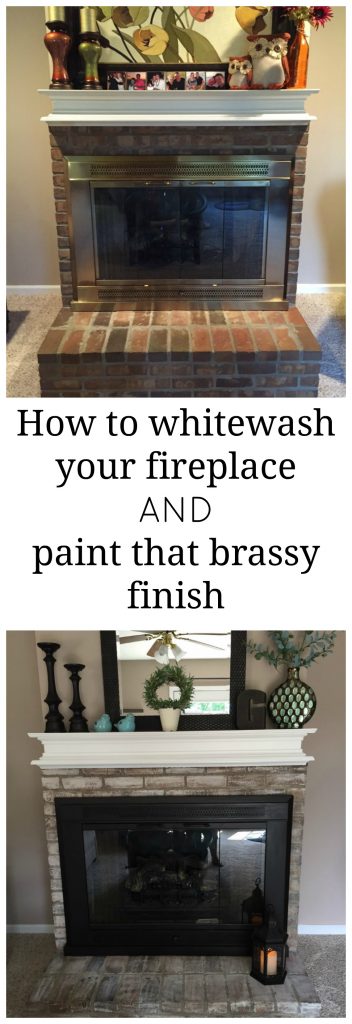
Here is a side by side:

Crazy, huh? Now, go tackle yours and send me pictures to grace_brooke@msn.com
I can’t wait to see yours!
PIN THIS BAD BOY FOR LATER!
Follow along on Pinterest, where I pin LOTS of amazing inspiration!
Last Updated on January 11, 2017


Hooray Brooke I have finally been able to post on your blog again 🙂 Thank you for sorting this out for me. I Just wanted to say that the fireplace looks super duper (beautiful) what a great change. I bet the lady is well happy with what you have achieved. I also love what is placed on the mantel – no doubt what you suggested? It doesn’t look ‘dated’ now it looks fab 🙂
I love that Rustoleum paint and was so happy we found it for our brassy fireplace front, too. We were lucky, though, and the whole front popped right off….well maybe not, popped right off, but it did come off, so we could use the spray paint on it. We chose the textured one and it covered sooooo nicely. I could hardly wait for it to dry and get that front back on again. Such a difference it made, just like in the one you did. Gotta love paint, huh?
Great job, Brooke! Can’t believe what a difference!
I love this and I’m getting ready to do my fireplace!!
My question is related to painting the brass. I tried painting a brass lamp with rustoleum paint and it looks like it’s pitted!! The lamp was clean – I don’t know where to go from here! ? Help!!
What kind of rustoleum paint did you use? The kind for the fireplace is not the same that I would recommend for something like a lamp or other brass light fixture. This is very thin and good for heat resistance.
Hello, this is so cute, I have a brick fireplace with the brick almost exactly, I have wanted to do something with it and did not know what to do, thanks for the idea.
Did you do something different to the grout? The color looks different? I have a stone fireplace that has the same brass insert and interested in trying this with mine. Love it!
Beautiful! My fireplace has tile instead of brick and I want to paint it. Have you ever painted tile?
Amazing job Brooke! Never underestimate the power of paint and a woman who know how to use them!????
I loved the fireplace. My husband and I have been wanting to do ours for years. We weren’t sure how to begin. Thank you so much for the before and after pictures. We are going to take the plunge. It looks beautiful.
The fireplace looks incredible, what a big change!