I am SO excited to have Shara from Chasing a Dream visiting with us today! Her Twisty Side Table has been a HUGE hit, with features by Ana White (yes, really!), Hometalk, etc… Shara is beyond talented, and I can’t wait for you all to see this piece of art that she created from just 1 board (with a step by step tutorial)!
Hey guys, how was your weekend? I hope it was awesome! It’s Monday again, so that is a little depressing, but I am still riding on a high from this weekend (not literally…). I was featured by ANA WHITE!!!! In case you think I am lying, check it out here. I know, right!? I am giddy! Just out of the blue I got on Facebook this Saturday and saw that she had featured me and my sliding barn doors. Seems like that was a popular post…it was featured on Hometalk as well! If you haven’t seen it already, you are missing out 🙂
On top of that excitement, I also finished this twisty table to submit for the one board challenge. I have seen several DIY bloggers advertise a one board challenge contest where the main rules are that you can only use a 1x8x8ft board, but you can build anything you want out of it. And you get a chance to win some sweet tools! I told Danny “I’m totally doing this!”
So I thought for weeks about what to build and I finally decided on a twisty side table. I could have done a million things (and may should have in order to win), but this sounded fun because it was a challenge to figure out. When I posted it on Instagram as my “official submission” yesterday, I had a couple of what I consider “big names” in the DIY blogging world comment on it!!! Like, whoa! I know, I am a little crazy, but that is exciting to me!
So, today I wanted to show you how I built it. I’m going to attempt to explain how this was done…but it’s a little hard to explain, so bear with me, ok?
First I cut two pieces from the board 2ft long. These will be the “legs.” I made a jig from a few pieces of scrap wood that would accommodate the angle of the board so that it would cut a straight line from top left corner to bottom right corner. I didn’t measure angles, I simply placed the board on the jig before I cut it and measured from edge of jig to a line drawn from corner to corner on the board at a few places to make sure it was straight, then I traced the angle onto the jig and cut it out. The top piece was to hold the board flat while it went through the saw.
I placed the board in the jig as shown and pocket hole screwed it to the jig so that it wouldn’t move while I ran it through the saw.
I tilted my saw blade to a 45 degree angle and lined my board up so that the blade would cut right at the top corner as shown in the pic below. I clamped my rip guide in place and made sure it was all squared up before I ran it through. I wanted it to cut a perfect line from corner to corner, so I measured multiple times to make sure everything was lined up perfectly.
I ran the board through the saw using the jig and making sure it was tight against the rip guide. Ignore the mess in my shop. I have a nice wood rack to hold all my wood….but I have a MASSIVE pile of random scraps on the floor with no place to go. I hate throwing away scraps…but let’s be honest, I will probably never find a use for 60% of what is there…I’m a scrap wood hoarder. Forgive the fact I am not wearing safety glasses…regular glasses count, too, right? Haha, no, no, they don’t. Do as I say and not as I do, kids.
Once that is cut, I had two triangle shaped boards. The board that is attached to the jig is the good one, so I set it aside. I attached the other board to the jig like the picture shows below and ran it through the saw exactly the same way.
Then, I repeated this with the other 2ft board, so that you end up having four triangles that look like the ones below. Setting up the jig and table saw are the hardest parts. Once that is set up, you just run them all through one after the other.
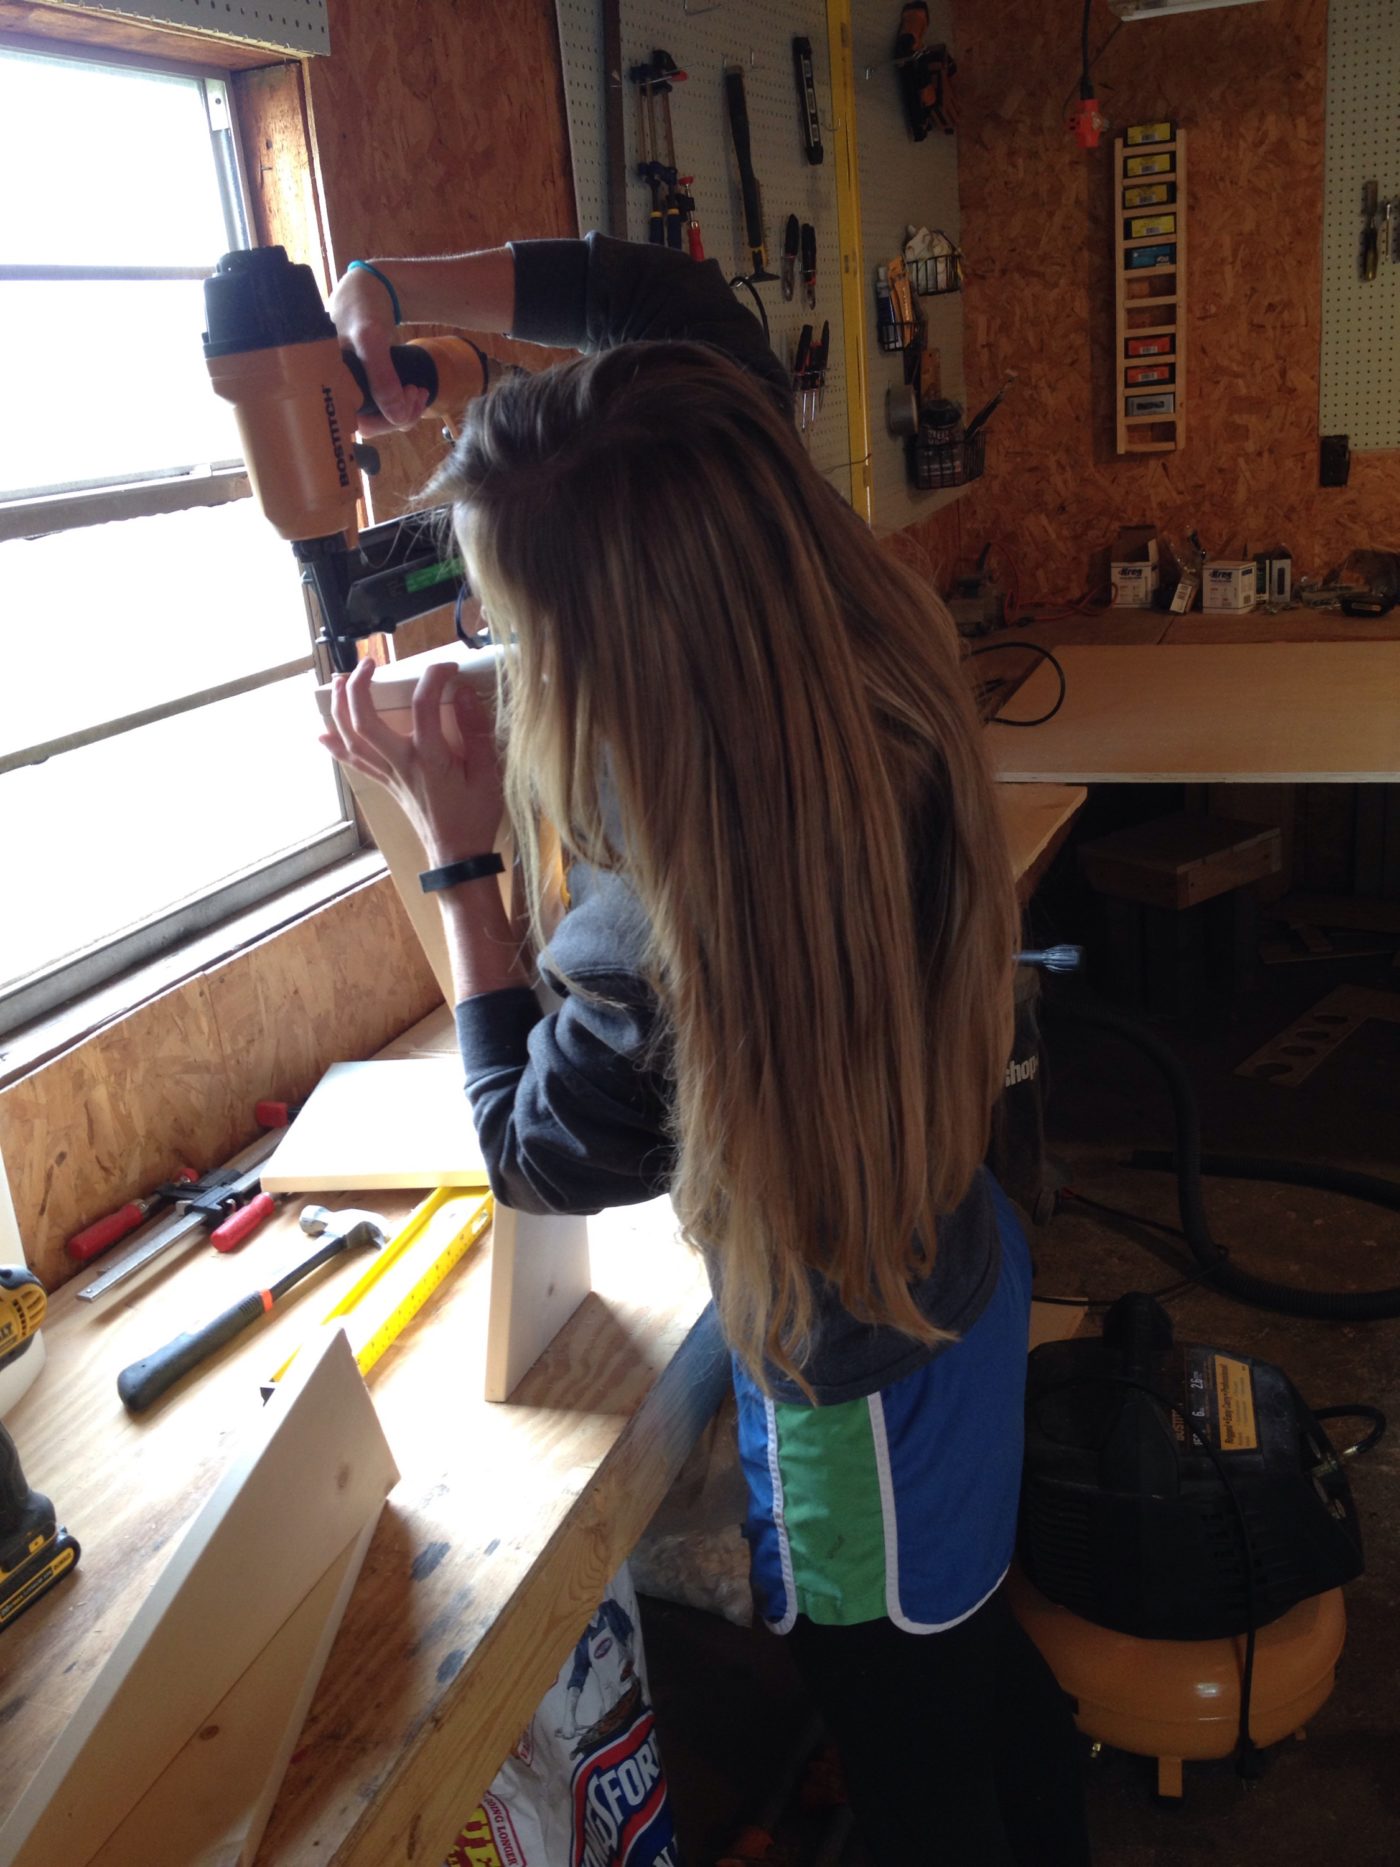
I took two triangles and fit them together like the picture shows below. I put some glue on the edge of one and then I….wait for it…..NAILED IT! HAHA…get it, nailed it? No, really, I put a few nails in it with my nail gun. I’ve been waiting for a while to find a good spot to be able to say that I “nailed it.” You know, like “I totally nailed it with this project”? Ha…funny, right? No? Okay, moving on…
I did this with all four triangles, so I had two “legs” that looked like this:
It took me forever messing with these angles to finally figure out it was really this easy….I have a math degree and I’m an engineer….and it took me a LOOOOONG time to figure this out. I still have blonde moments…
I placed the board on my miter saw like this, and made sure that the edge was perfectly square against the back rest and cut. I did this for both ends of both legs. I cut one at a time and set the legs up like they would be on the table to make sure that I got the directions right on the angles.
Danny took these pictures for me….I never realized my hair was this long. WHOA. I may or may not be a hippie…and I may or may not need more highlights…don’t judge…
Once the angles on the legs were cut, I fit everything together to make the top and bottom pieces. I lined them up on the remaining pieces of the 1×8 board and marked where I needed to cut for the top and the bottom piece, and cut it. Then, I nailed it on with the nail gun.
Once the bottom was nailed on, I flipped it over and marked where to cut for the top piece and cut it and nailed it on the same way, making sure to line everything up well.
Then, I stained it, and brought it inside! I know you can see marks where I sanded against the grain…I know this is against the “rules” of woodworking. My miter saw blade is dull and I haven’t gotten a new one yet, so I have to sand off the rough spots after each cut and I thought I sanded off all the scratches, but apparently I did not. Amateur mistake. That’s me….and amateur…
But, seriously, isn’t it adorable!?! Please ignore the dust bunnies…I’ve been busy in the shop and haven’t vacuumed in….let’s not discuss details.
Hope you enjoyed the making of this twisty table as much as I did 🙂 Trust me, you couldn’t have…I had so much fun making this!
Now, get to building! Oh and if you have any more ideas for another one board challenge project, I would love to hear it….I’m running out of creativity and I’d love to make one more project! Be sure to follow me on Instagram and Facebook for lots more projects coming soon!
Last Updated on November 2, 2015









Leave a Reply