For those of you who are just now tuning in to Re-Fabbed, Welcome! It gets a little crazy around here at times, but I have lots of fun and easy DIY projects, tutorials, decorating tips, a few deep thoughts and all kinds of other nuggets of goodness going on!
You see, right now….I am living in a single wide mobile home on our farm that we bought, until we get our home built- which will start very soon! Whoo Hoo! But, although this is a temporary home, I want it to be as pretty as pleasing to the eye as possible- but on an almost non-existent budget. Is that even possible? YES IT IS!
I get lots of emails from people asking me about my cabinets. I feel like a horrible blogger, but I never did a tutorial about them! I barely even shared what I used. Shame on me.
While I don’t have a tutorial or “in progress” pictures to show, I did want to pop in and share a few before and after pics, along with some details of what I did and what I used for my cabinet makeover. I think that will help answer many of the questions I receive.
**One thing that is funny and the main reason I do NOT have a tutorial is this…. When we were getting close to moving into this mobile home, I knew I needed to get in here and get going on the cabinets so that they would be ready for the move. Things were SO HECTIC, and it was raining non stop. Our house was sitting smack dab in the middle of the MUD, and I mean MUD. Deep MUD. There was no easy way to get to the house, and there was no walkway set up yet when I started painting. While walking into the house one day with my daughter (5 year old) on my back and lunch box in my hand (gotta have snacks), I trudged through the mud. Then…..my shoe got completely stuck and I fell flat on my face- WITH my daughter on top of me. Every snack was muddy, we were soaked in mud, and I was beyond frustrated! LOL. It is funny now- but not then! I finally got to the house, got mud alllllllll over the floor and counter- and just started painting. The last thing on my mind was pictures! hahaaha. Oh me…what a day**
So, back to the cabinet makeover.
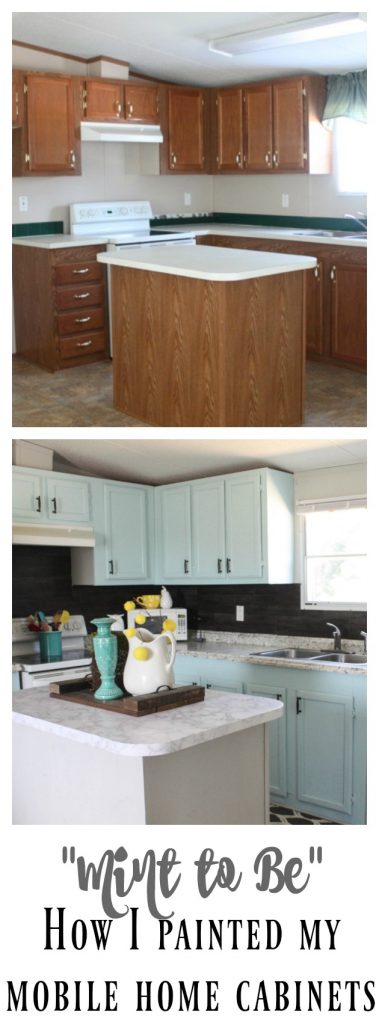
Here is the kitchen BEFORE we did anything to it:
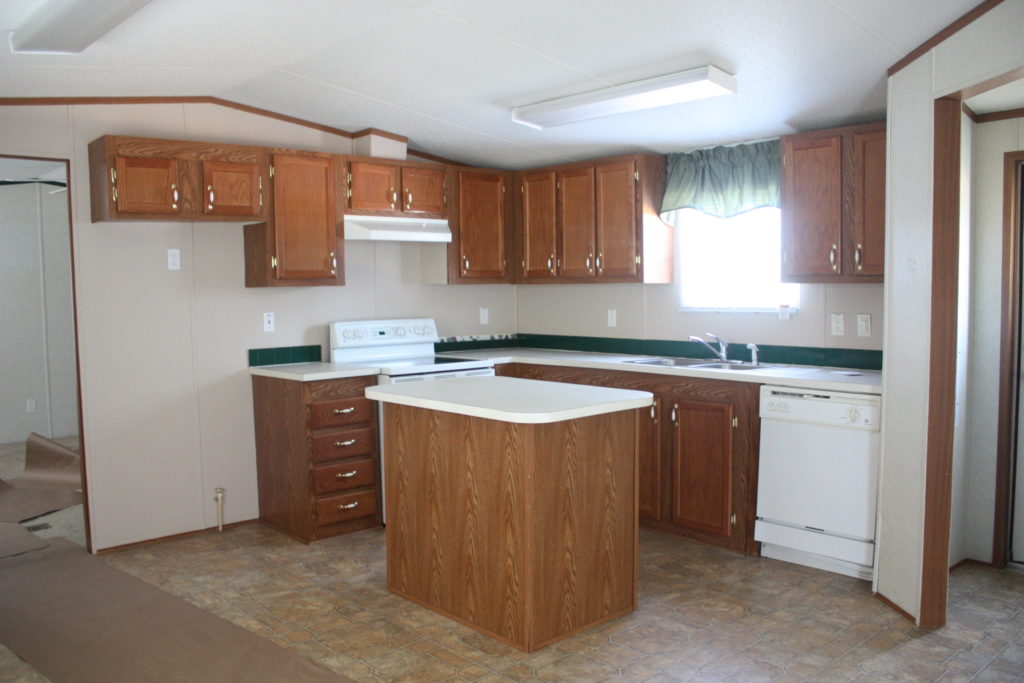
These cabinets are NOT real wood.
I do not like chalk paint for kitchen cabinets. I do love chalk paint for many things, but not kitchen cabinets. The upkeep is a lot, and the wax wears out due to constant wiping, and it needs to be redone. I am just not a fan. That does not mean there is one thing wrong with using it if you have or want to. This is just my personal opinion.
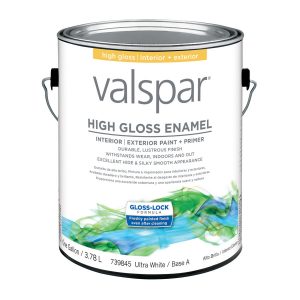
I decided to use Valspar’s Gloss Latex Enamel Interior/Exterior Paint and Primer in One on my cabinets. I looked, researched, and talked to the paint man at Lowes for a while before deciding, but for these cabinets- it seemed like a good fit. I also liked that it had a built in primer. That is always a huge plus for me because it means less work!
The color I chose to use on these cabinets is called “Mint to Be”. I thought it was going to be more of a mint color, but it is actually more of a light aqua. It is absolutely perfect, though…and I do LOVE it. I used a 2″ Purdy Brush with an angle, just because that is my favorite. Everyone likes different types of brushes, but the main thing in something like this is to use a GOOD BRUSH! Don’t skimp! I also rolled the flat surfaces with a small roller to make the process quicker!
Below are some affiliate links from Amazon, if you wanted to purchase any for yourself.
I kept all the cabinet doors on for this project, and I did not sand. The way I did these is not necessarily the way I would recommend others to do theirs, but with this being a temporary home and very inexpensive made cabinetry, I opted for an easy fix that looked good. I also needed to get done as quickly as possible, because our former house had sold quickly and we needed to get out! (See our previous Home Tour, HERE! We flipped a foreclosure and it is crazy the makeover!) They have held up very well, and they have been done for over a year with LOTS of use.
*I would typically say you need to take the doors off, sand each one at least slightly, wipe down and then paint.*
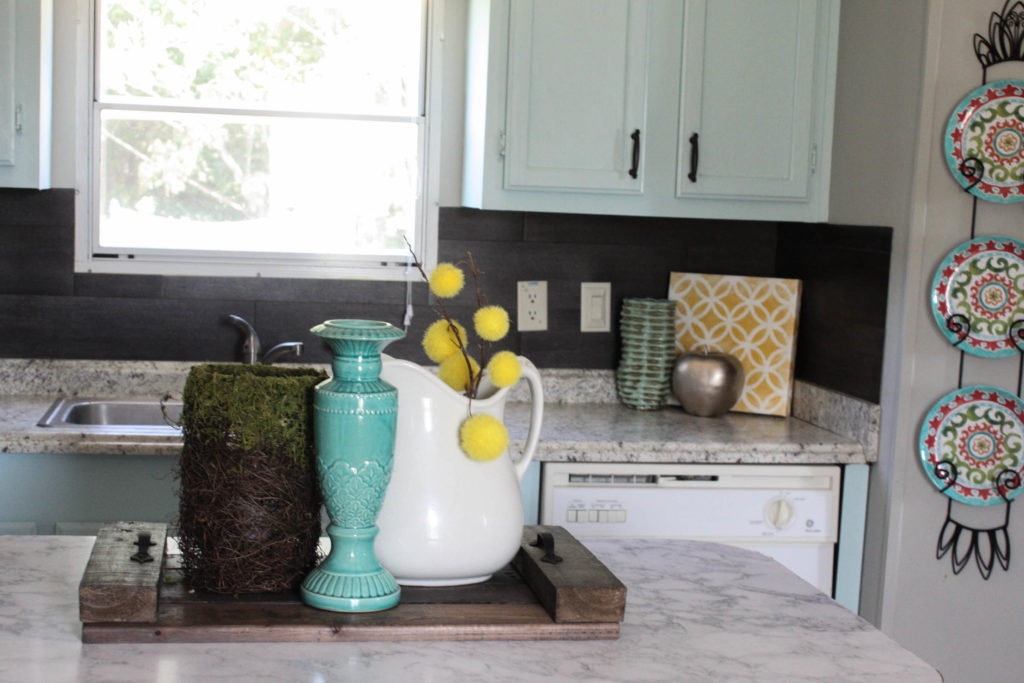
Here is the AFTER:
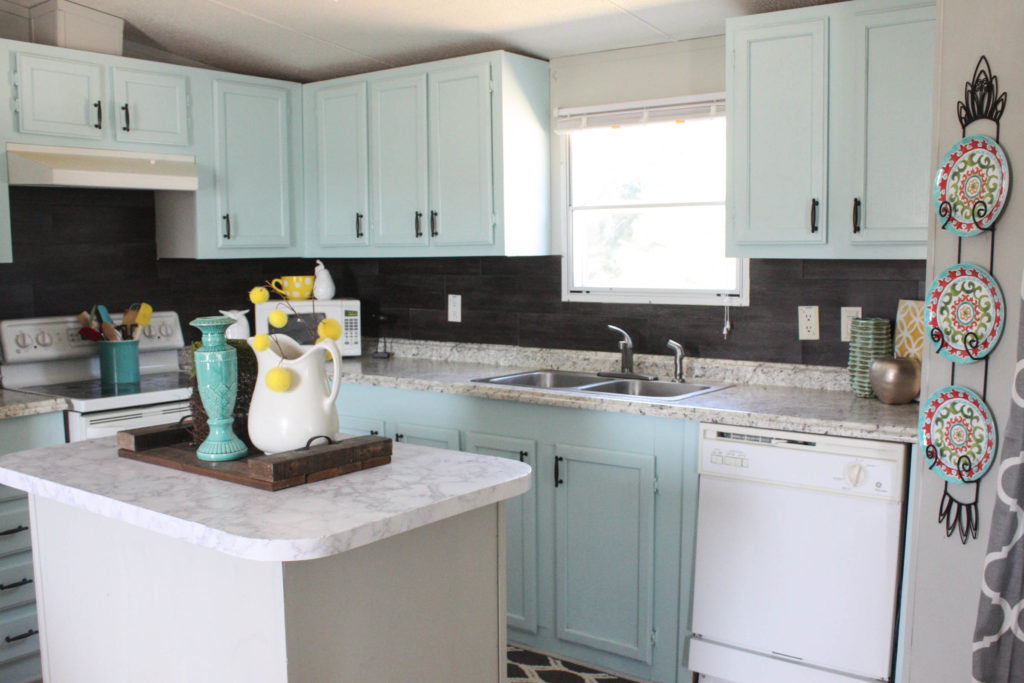
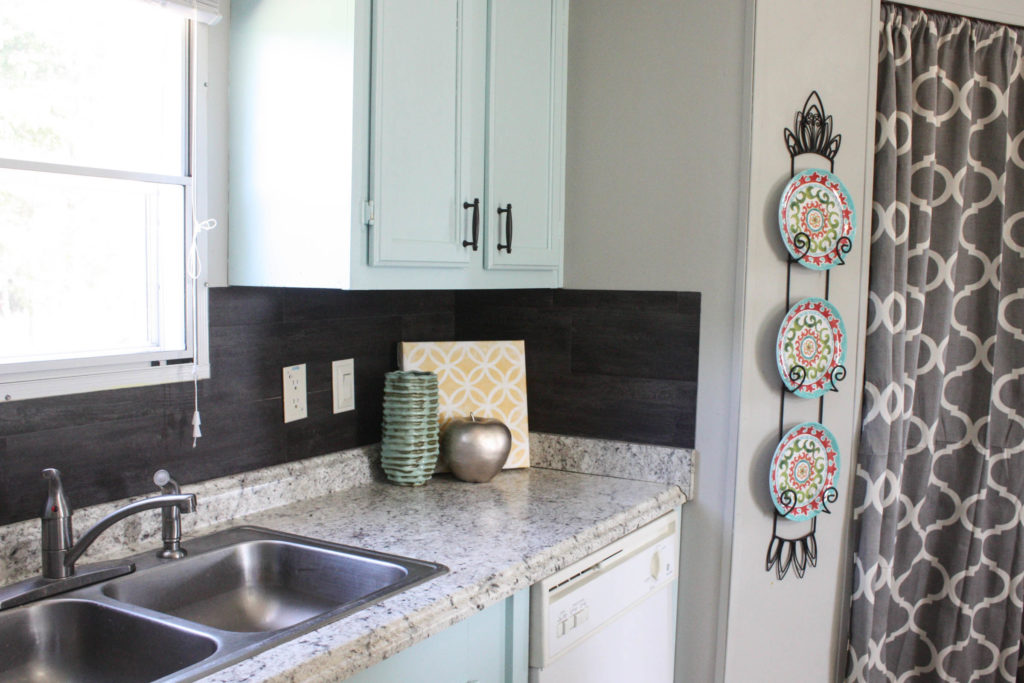
What a difference some paint makes, huh??? (And new hardware!) All together the cabinets came in at about $160 total, including new hardware. I used 1.5 gallons of paint ($60) and spent a little less than $100 on the hardware. The hardware came from Lowe’s as well, and I loved how they popped against the cabinet color.
These pictures are from my post about our back splash, which was less than $40 using vinyl flooring! (See that post HERE!)
LOTS of changes has been made to this kitchen since these pictures, like my dishwasher getting painted! You can see my post full of my KITCHEN DIY’s and get caught up on some of the fun changes!
I hope this post helps you get a better idea on what I did to change these cabinets up! I hate that I didn’t have a tutorial with pictures for you. Feel free to ask me any questions you have in the comments or shoot me an email!
PIN FOR LATER!
Last Updated on July 9, 2018
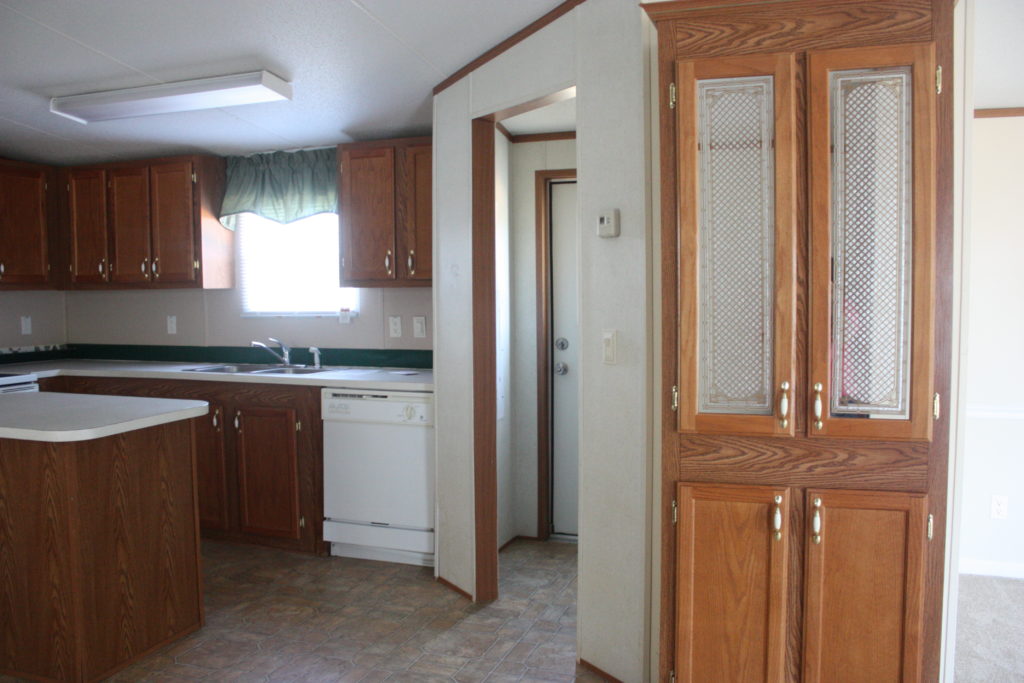







Thank you for this!!! I live in a manufactured home and I want to paint my cabinets. I noticed on the original picture the backsplash is tile, was it easy to get off or did it mess up the wall? My walls are drywall, not the panels that you see in most trailers.
There was just a little row of hunter green stick on tile, and it didn’t damage the wall!
What color are your walls? I also live in a manufactured home and am wanting to paint the kitchen and cabinets! Love what you have done to yours!
Oh also, did you have the panel strips on your kitchen walls where you did the backsplash or did you just take them off there?
There were no panel strips, just a thin layer of peel and stick tile! We took that off and covered with the vinyl flooring backsplash.
The wall color is Madeline Steps by Valspar. I’m not sure if they still carry it on the paint chips, but they can still mix it if you tell them the color 🙂
I live in a manufactured home and the cabinets are outdated.Will try tonpaint the cabinets. What color would you suggest for a farmhouse themed kitchen?
I would paint the cabinets white or a light gray 🙂
What kind of countertop did you put on the center island?
Well- that is actually peel and stick vinyl!
Did you use peel stick on the counter tops as well? I have a mobile home that is very similar I am getting ready to move into and I hate the counters. I am looking for a budget friendly DIY counter solution.
The countertops are just the cheapest option that they have in stock at Lowes 🙂
Laura…I did a lot of research also on CHEAP countertops. If yours are not in bad condition>meaning, no burned spots or deep scratches, etc. You may want to search youtube. com. People are so very creative! You can actually use (cheap) ACRYLIC PAINT, sponges, masking tape, etc. to create your own colors/patterns and then seal w/Epoxy stuff (?) and viola! They say for like $20 to $60 and you have a whole new look. The best deal is…if you use the correct Epoxy stuff, you can sit hot pans, etc. — suppose to be very durable. Check it out, best of luck! Diane in Dallas, Tx [search: “DIY Painted countertops ” on youtube] You’ll get lost in possibilities! Tip: keep it simple and not too complicated 😉
I’m going to be doing this soon myself! 🙂
It all looks gorgeous! You’ve given me motivation, Brooke. Maybe now I’ll actually do my cabinets…maybe… ?
The makeover looks really gorgeous! I like the details and the olours that you’ve chose. What is the colour of the cabinets?
Mint to Be by Valspar
Thank you!
I understand the need for advertising but lately, your posts are hard to read. I end up clicking on too many of your advertisements unintentionally which is frustrating. Sorry for the rant. Your cabinets look great.
I apologize. I don’t place the ads on the site myself…my ad agency does. I am very sorry if it is interrupting the reading! Unfortunately, I do need them to help me be able to continue running the blog and the expenses associated with it ?
Thank you for the compliment on the cabinets!
I’ve nearly completed an entire kitchen remodel on a super tight budget. I love this idea of your backsplash. I ordered & just rec’d cases of peel n’ stick white (sm. pattern) subway tiles (cheap!). I’m at the end of remodel and of course … budget …. LOL I only have a $110 left to buy ‘incidentals’. I wish I could pick your brain so to speak — send you a pic for your idea —. I think I need a ‘transition’ between the counter attached backsplash & the peel n’ stick white subway tiles??? But I’m at a loss. I don’t want too much color or pattern. I think we have nearly exact same multi countertops. Thx, Diane in Dallas, Tx
Absolutely love your work with your kitchen remodel! I’m actually about to start the moving process & looking into remodeling myself. Could you clarify the paint that you used on your cabinets? In one post I saw Valspar, in another I read Sherwin Williams
It is called Mint to Be. I believe it is Valspar, but if you go to the paint counter at lowes and tell them Mint to Be- they can find in their system even if not still on a paint chip 🙂
Hi there, Taylor here from Canada. What exactly did you do to prep your cabinets before you painted? I’m looking to paint over my mobile home cabinets as we are looking to sell! So I need a quick easy fix for my ugly cabinets!
So pretty!! I’m wanting to redo our mobile home cabinets as well but we have several that are peeling. Any help on what to do to cover this will be greatly appreciated.
Did your cabinets have a top part you had to remove? I don’t know what they are called but like little bars all the way across that have no functionality just for “looks”
I need to know how to remove these. Thanks.
Hello I am in the process of painting cabinets in a rental mobile home they are not real wood so they don’t sand smooth I wish there was something I could apply to make the surface smooth I have used several coats of high gloss paint. We did put a new counter top and I am going to use the vinal floor tiles for the back splash. Any ideas on the doors would be greatly appreciated.
Thank you for the inspiration – you have given me hope! Just purchased an early 80’s double wide. Was really nervous, now . . . not so much!
Hi! I was looking for info on how to remove the top of the island in my mobile home when I stumbled upon your blog post. I can’t for the life of me figure out how they have it attached to the base! Anyway, I noticed you used Valspar high gloss latex enamel interior exterior paint on your cabinets. I started using the very same paint in white for my upper cabinets and it got hijacked for the trim elsewhere in the house. When I went to Lowe’s to get more paint, they had discontinued this exact paint! They no longer carry the latex enamel you used in your kitchen. Unfortunately for me, I had already painted the cabinet doors but not the cabinet bases so now I have to paint the doors again to match the new paint! I just thought you & your followers might like to know that they don’t carry this paint any longer. BTW, Gorgeous remodel!